Add a table
A table can be added to a content element such as Text, Text & Images or Text & Media.
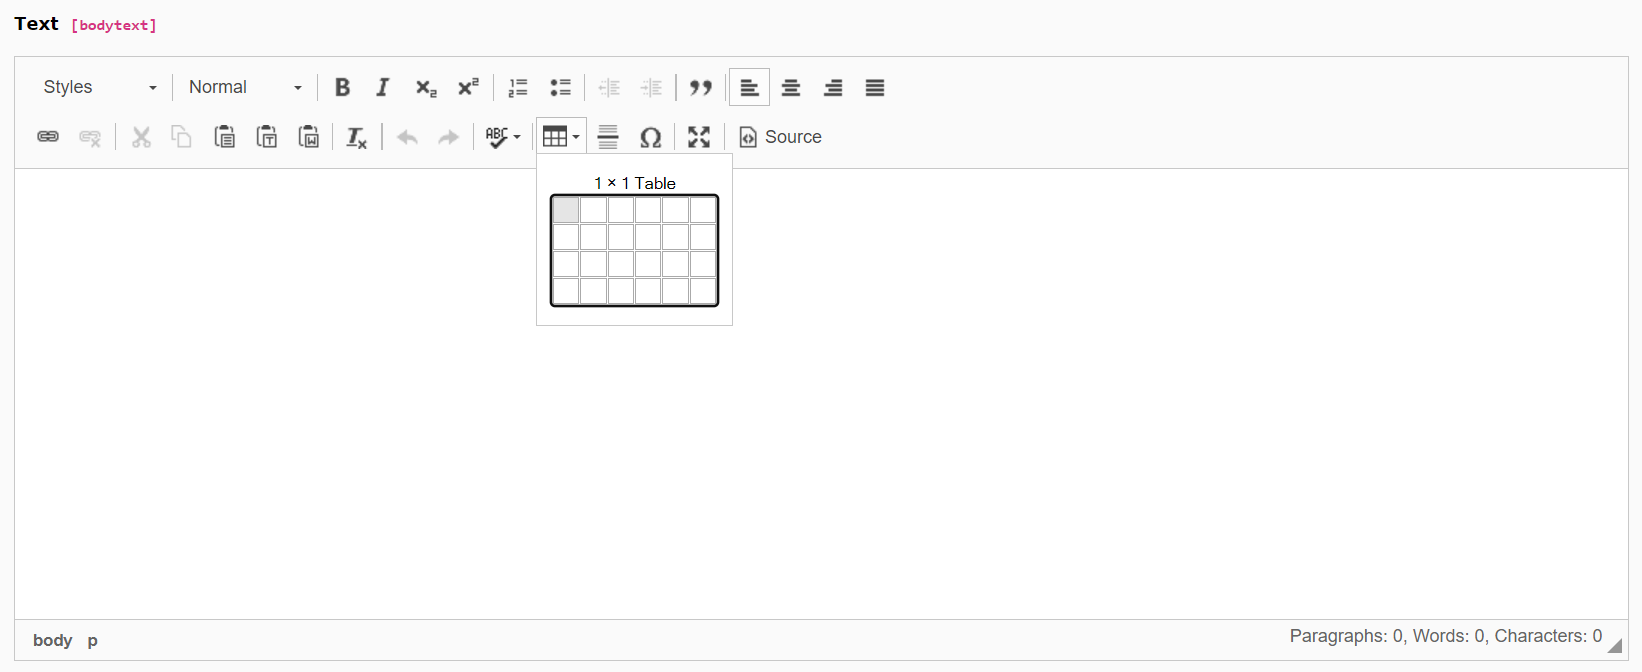
Once inside the content element, go down to the 'Text' area which is also known as the Rich Text Editor. Click the Table icon. You can then select the number of rows and columns you want the table to have.
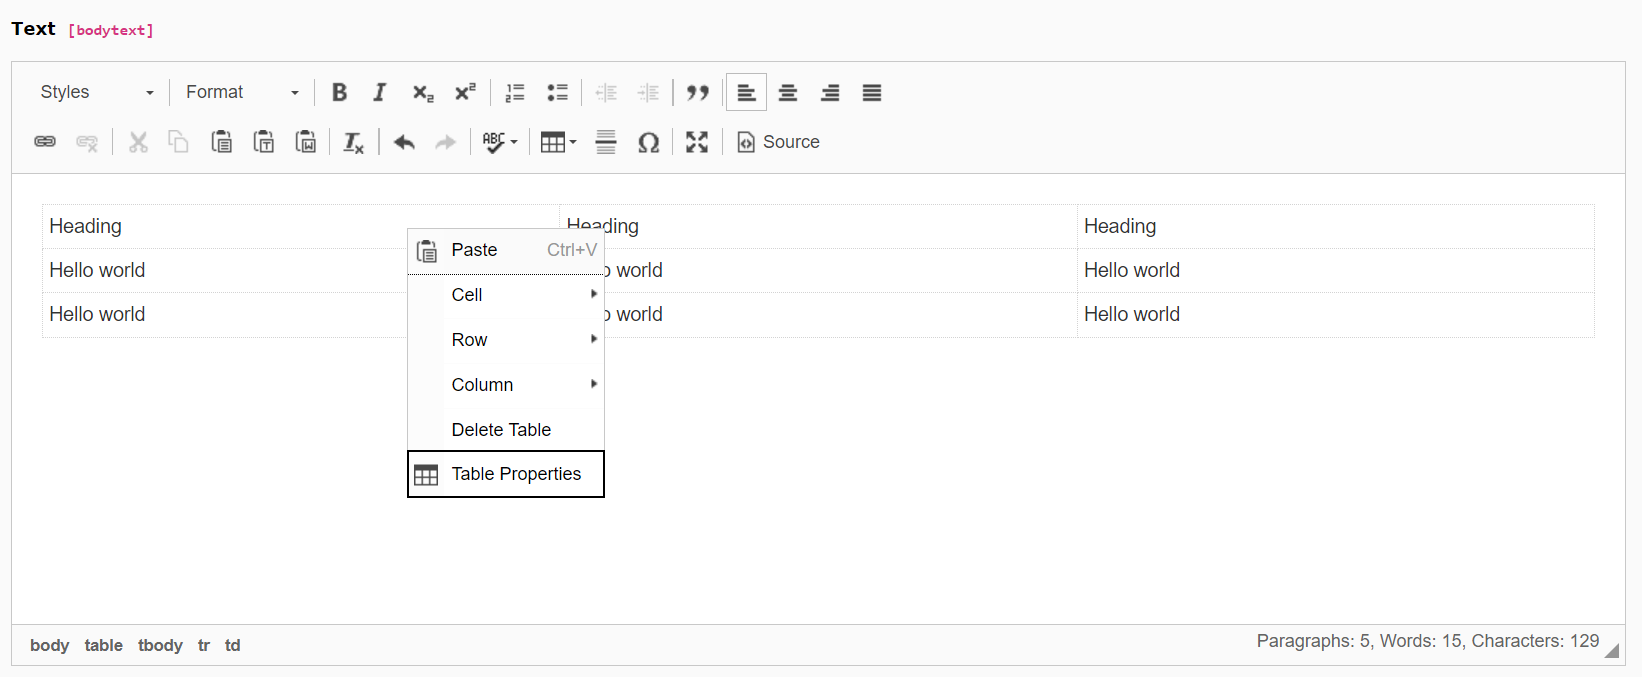
Enter the data inside the table ensuring you have a row or column for the table headers.
Setting Table Properties
Right-click anywhere on the table and select Table Properties from the dropdown menu. This is going to allow you to ensure your table meets the WCAG accessibility standards.
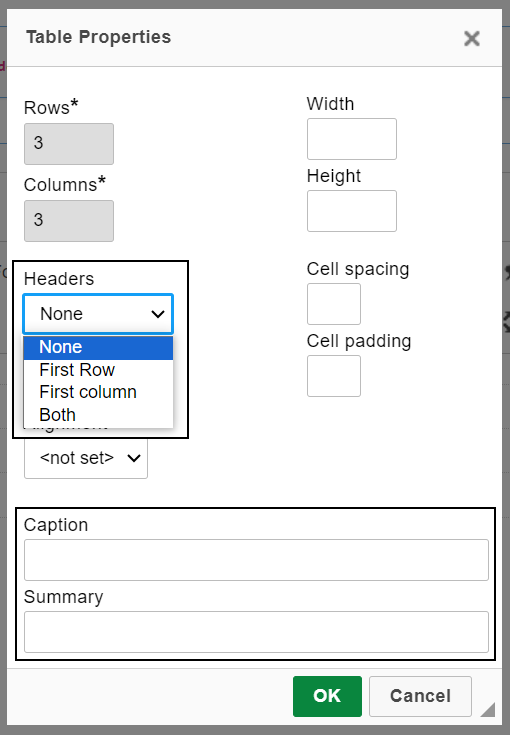
Using the Table Properties window you must ensure you set Headers to your table. This ensures your table doesn't fail the following WCAG Level A standards:
- 1.3.1 Info and Relationships
- 1.3.2 Meaningful Sequence
You can further improve the accessibility of your table by adding a caption and summary. If both caption and summary are provided for one table, the summary should not duplicate the information present in the caption.
- A caption functions like a heading for a table. Most screen readers announce the content of captions. Captions help users to find a table and understand what it’s about and decide if they want to read it.
- A summary provides information about the data in a table and helps users navigate it. A summary is usually only needed for complex tables.
The table headers will be shown visually inside the TYPO3 Rich Text Editor by appearing bold and centered. The captions will appear above the table and the summary does not get shown as this is just for those using assistive technology.
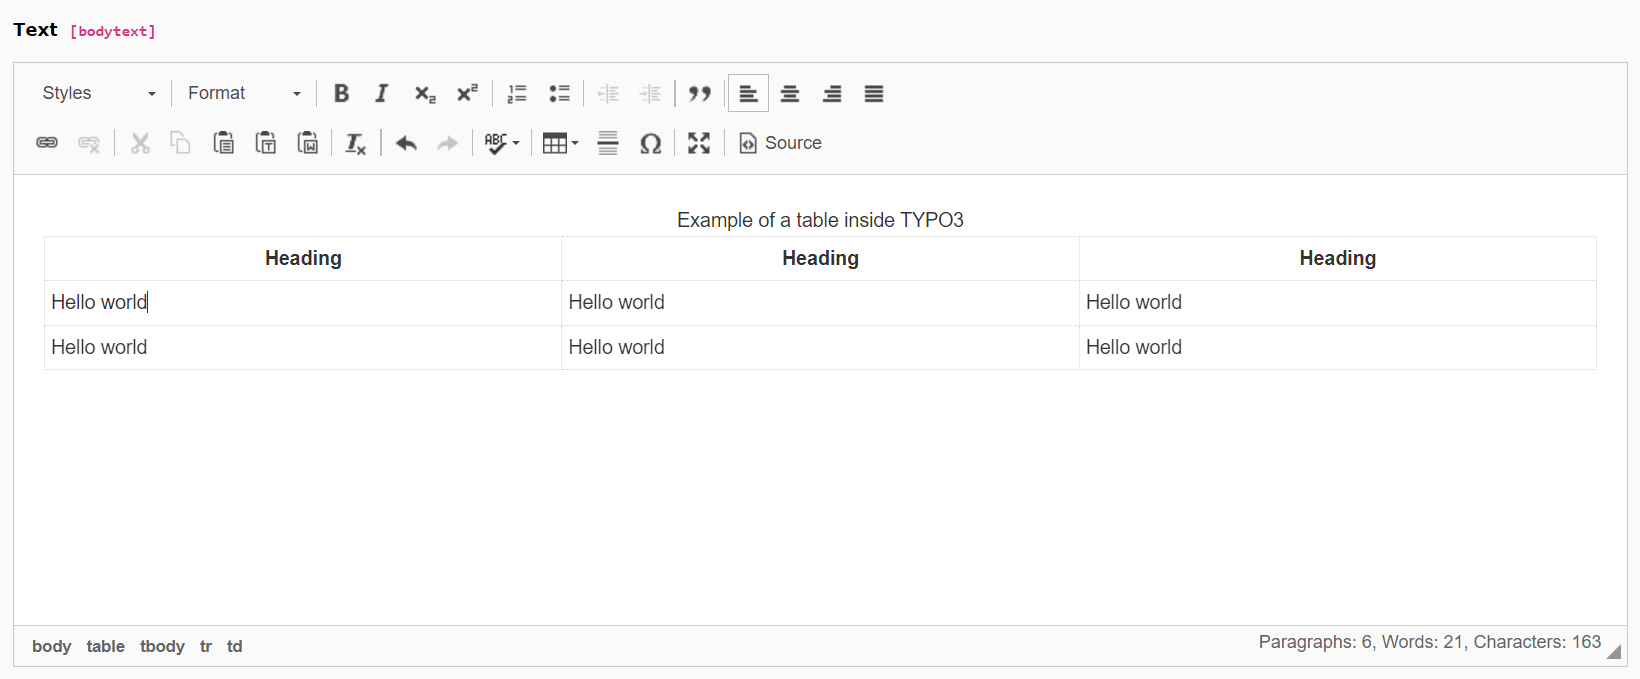
Please note: The table will appear visually different when viewing the page in a browser and will follow the overall styling of your site.